How to Add Rounded Corners in Elementor: Images & Containers
Rounded corners can soften the feel of the page and help give it a more cohesive feel. Here’s how to add rounded corners in Elementor editor, both images and container elements.
How to Add Rounded Corners in Elementor: Image
Added rounded corners is a simple process in Elementor.
Please Note: Make sure that you’re editing with Elementor. You can either 1) click Edit with Elementor in the page list or 2) click the large blue Edit with Elementor button while editing the page.
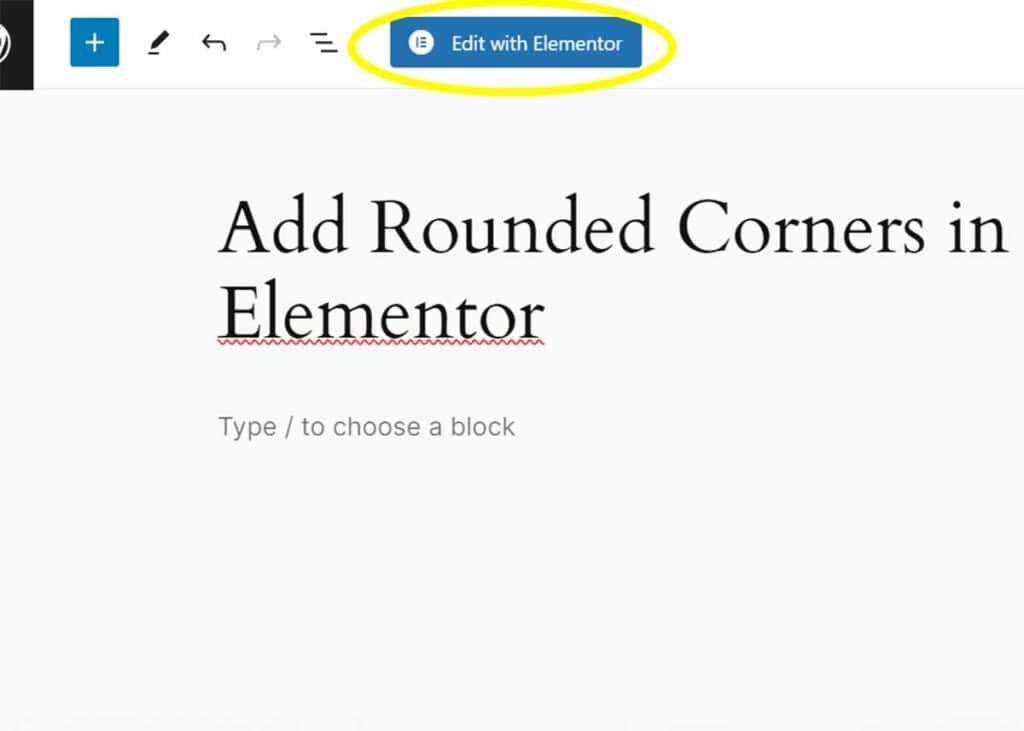
Step 1: Add Image Element
If you’ve already added an image, you can jump to step 2.
- Begin by opening your page.
- Next, you’ll click the + to add a new element.
- For this test, click Image, then Choose Image. You’ll either upload your image or navigate to it in your Media Library.
Step 2: Edit Image in Image Widget
Now it’s time to add rounded corners to your image.
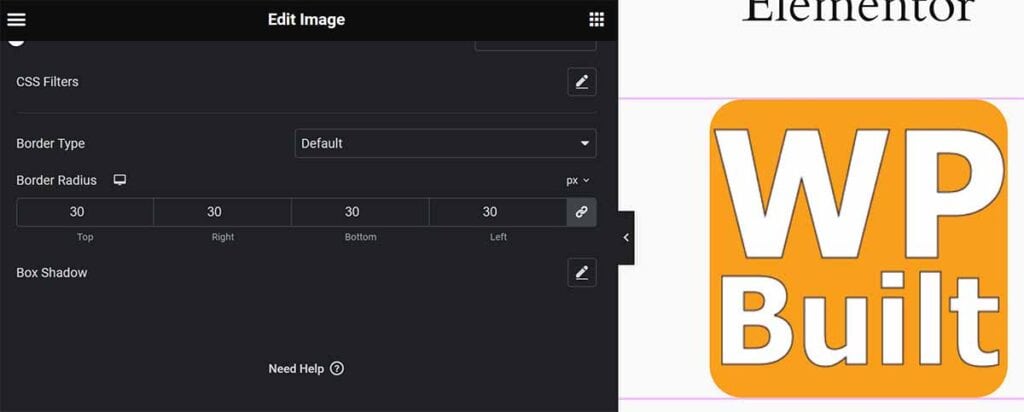
- Select your image element. You should see an Edit Image widget in the left sidebar.
- Go to Edit Image > Style > Border Radius. You’ll find this at the bottom of the menu options. You can also find the Border Radius settings under Edit Image > Advanced > Border.
- You can set the border radius to either px, %, em, or rem. The most common is px. To get the correct radius number, you’ll just have to play with it a little until you get the look you want.
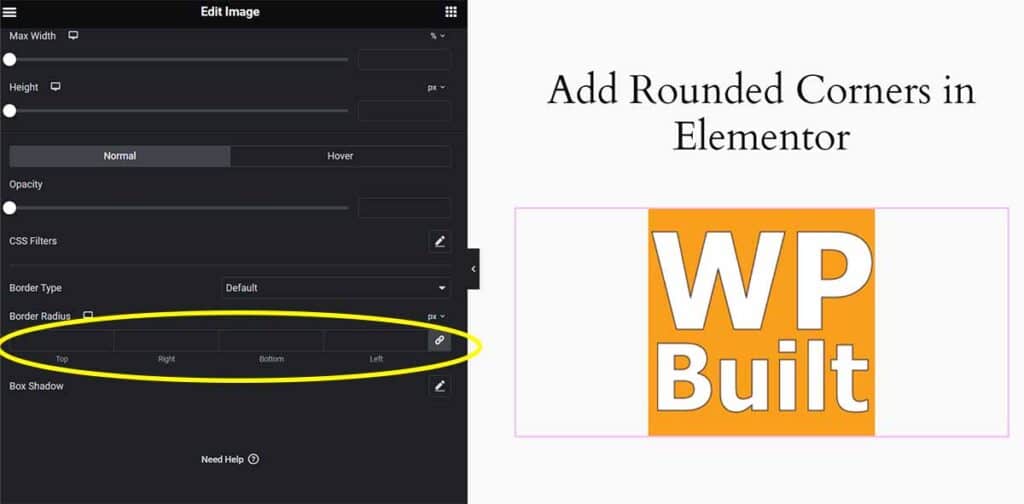
You’ll notice at the far right of the border radius fields is a Linked toggle. If you toggle this on, it will link the values together. This gives a consistent look and saves the time of entering the same number into each field. See image below.
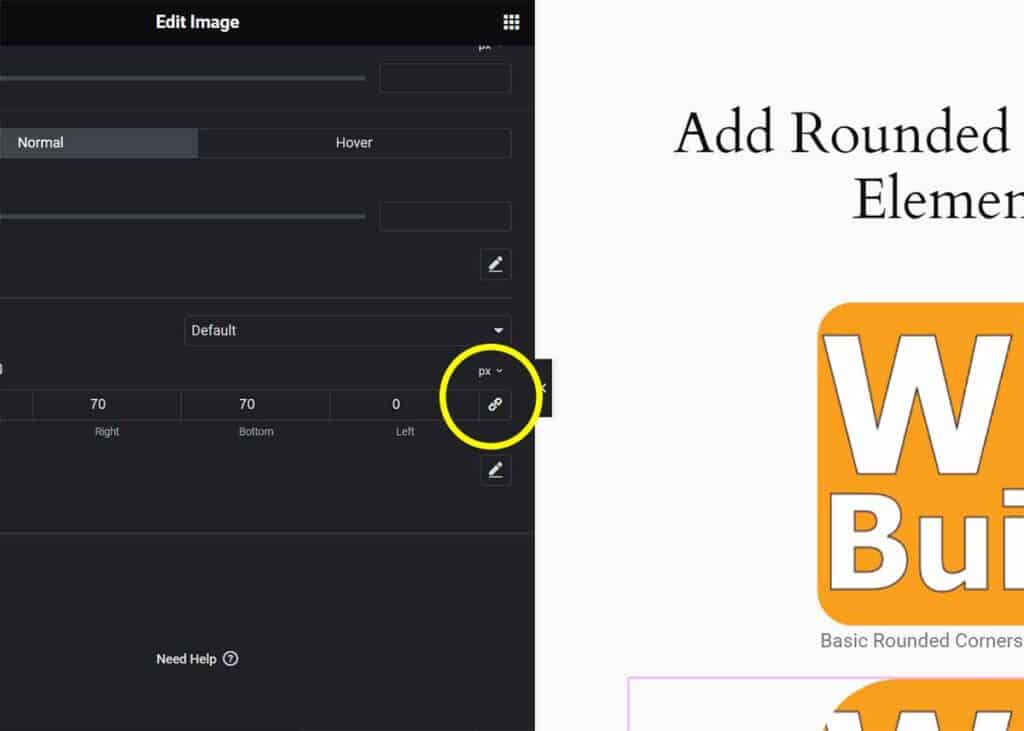
You can ignore the Border Type setting. This adds an outline (solid, dotted, dash, etc) to your image.
Step 3: Advanced Edges
To customize the look of your rounded corners, you can toggle the Linked option off. This allows you to enter different values for each corner.
Here are a few possibilities.
You can round three corners, leaving the fourth square. This can be used like an arrow or a speech bubble.
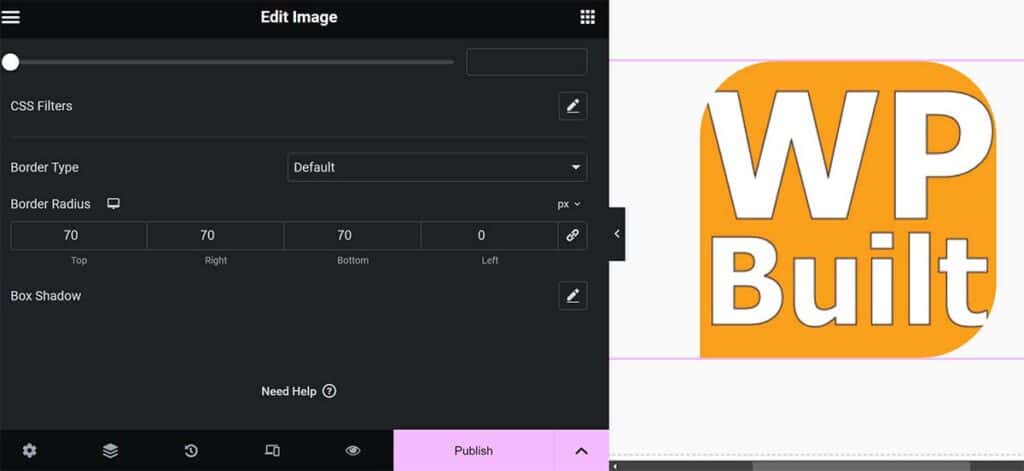
You can round the top two corners and leave the bottom corners square.
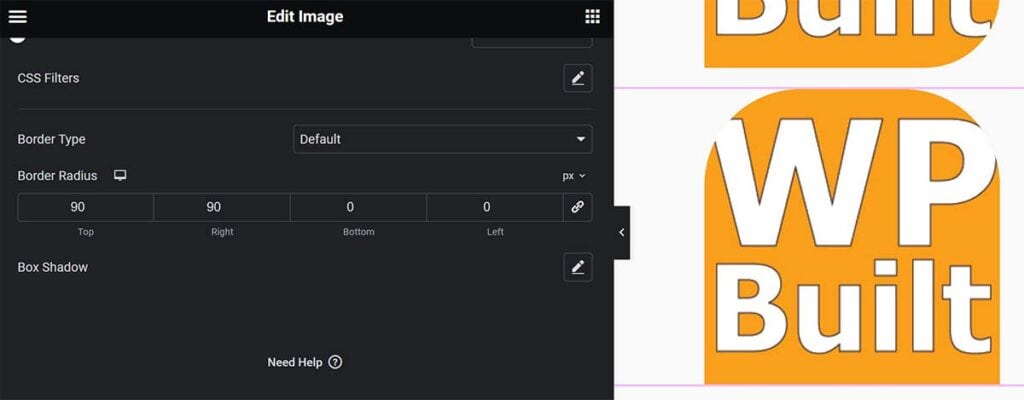
How to Add Rounded Corners in Elementor: Container
Added rounded corners to a container is a simple process in Elementor.
Please Note: Make sure that you’re editing with Elementor. You can either 1) click Edit with Elementor in the page list or 2) click the large blue Edit with Elementor button while editing the page.
Step 1: Select Your Container
With your page open, and editing with Elementor, select the container that you want to customize.
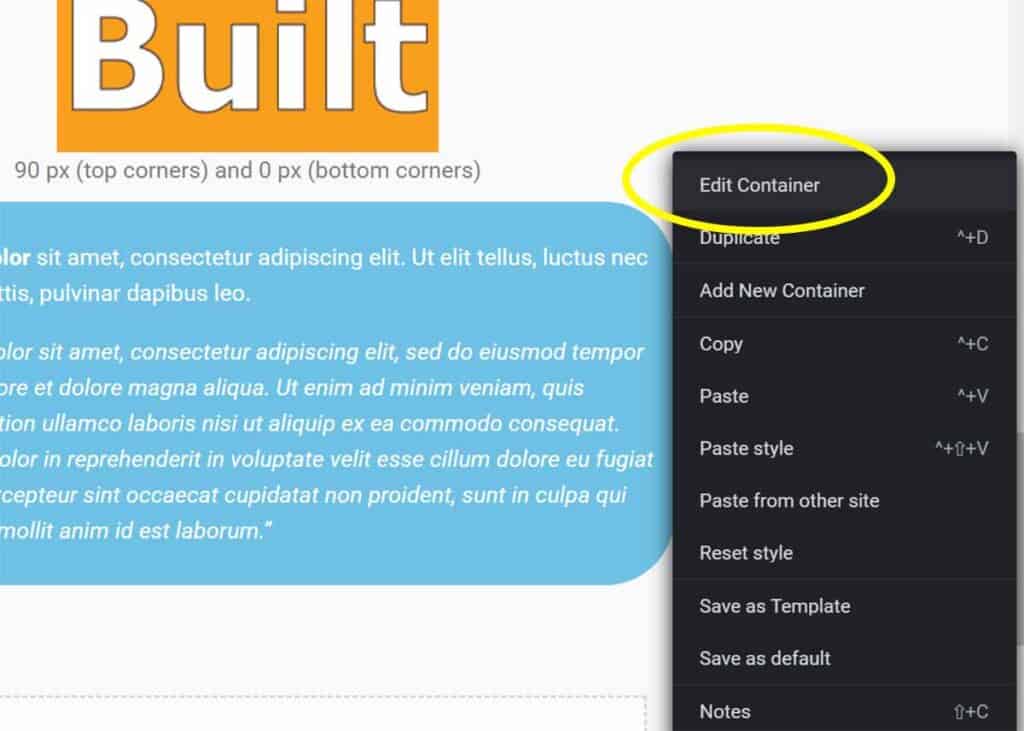
Step 2: Edit Container Settings
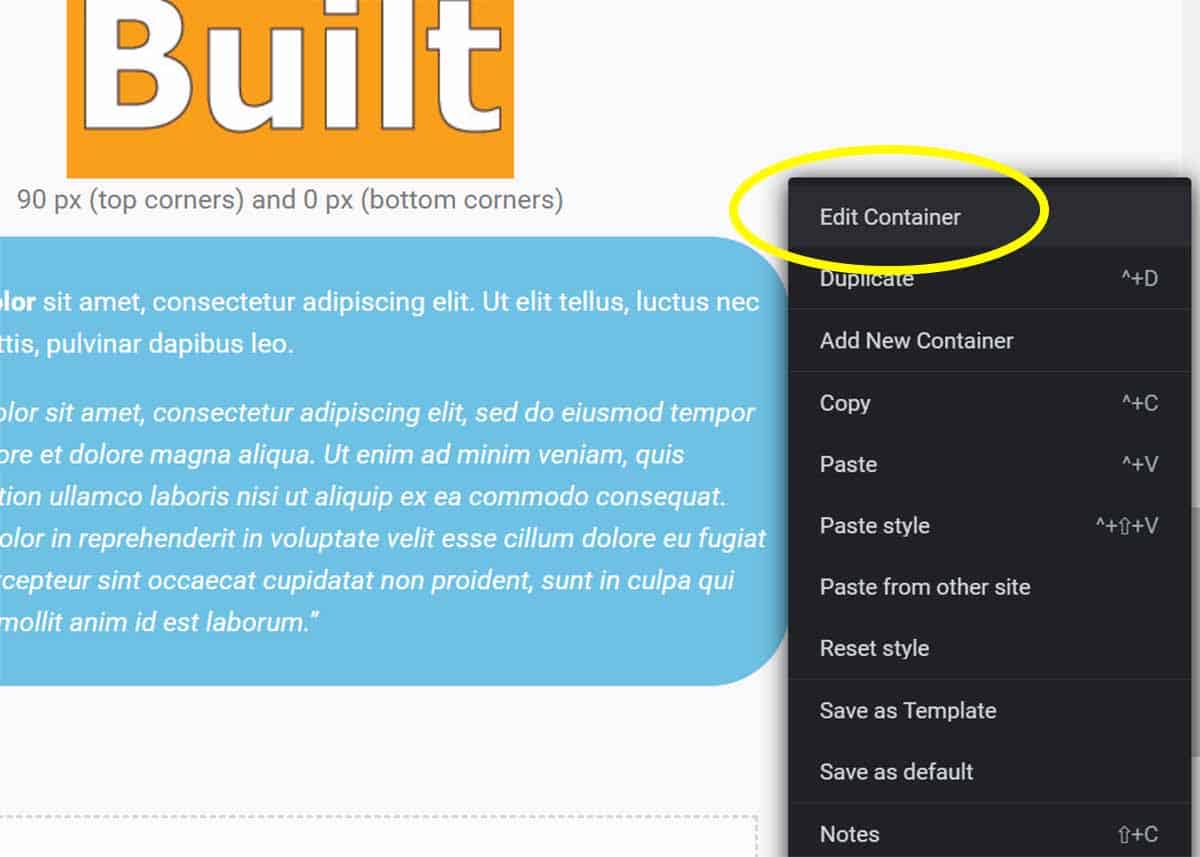
- Right-click on the container bounding box and click Edit Container.
- For text containers, go to Styles > Background > Color. Select the color you require.
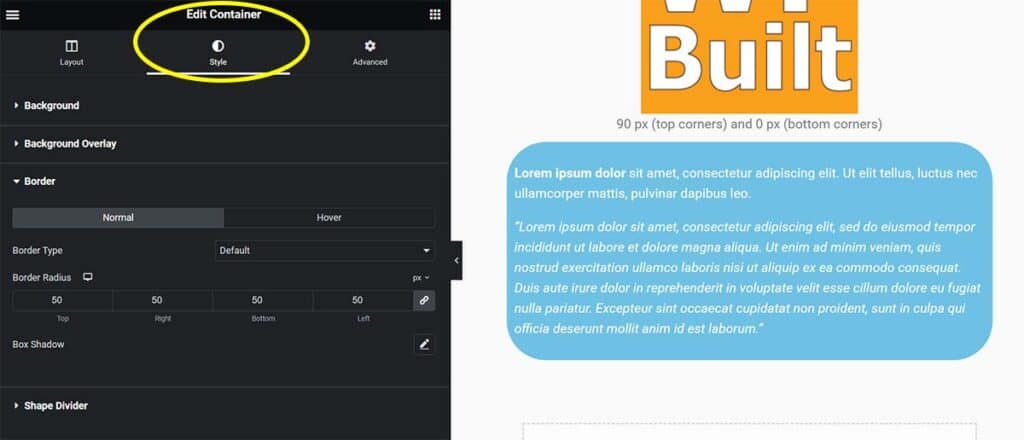
- Now scroll down to Styles > Border > Border Radius.
What is a good border radius? It depends on what you want it to accomplish and how it will fit with your design. Experiment and test. My recommendation is to start subtle and check across devices.
You’ll notice at the far right of the border radius fields is a Linked toggle. If you toggle this on, it will link the values together. This gives a consistent look and saves the time of entering the same number into each field.
In the example, I changed the background to light blue and the text color to white. The border radius is set to 50 px.
Here is the page with all these customizations live.
To help your container and text box stand out, consider adding a hover effect.
Your turn
How did it go for you? Do you have a question or maybe an advanced tip to share? I would love to hear from you in the comments.

