How to Create Color Gradient Texts in Elementor: 4 Easy Steps
Creating some fancy color gradient text can add some interest to your pages. It can help draw the eye to important details. Or maybe your client just loves how it looks and has tasked you with creating color gradient texts in Elementor.
Creating gradient text like this in Elementor is easy. Just add a little CSS (included below) and you’ll have beautiful gradient text.

Create Color Gradient Texts in Elementor: 4 Steps
Here’s how to create color gradient texts in Elementor. This tutorial works for all types of text: Headers and paragraph texts.
Step 1: Open Your Page
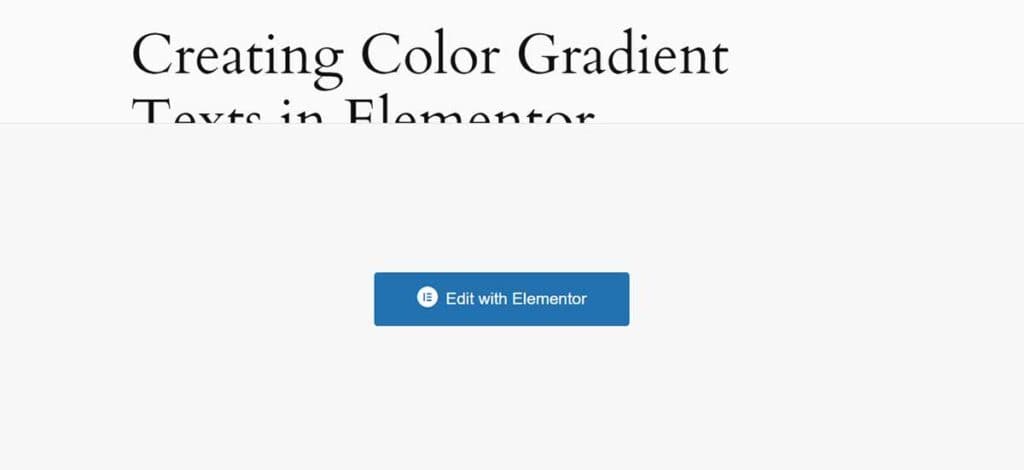
To begin, you’ll want to open the page that you want to apply this styling to.
You can either 1) click Edit with Elementor in the page list or 2) click the large blue Edit with Elementor button while editing the page.
Step 2: Edit Your Text
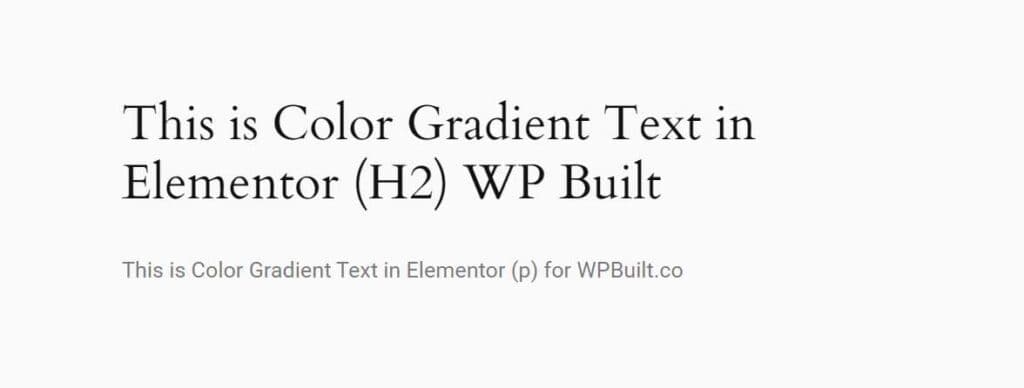
Next, you’ll select or create the text to be styled. Remember that small text and fine fonts will make it more difficult to see the gradient color.
To help your text be more visible, you can change the paragraph text to a header, make it bold, increase font size, or even do all three things.
In my example, I created a H2 header and a line of paragraph text.
Step 3: Add Gradient Color
- With your text selected, go to the Advanced tab (top right) of the widget.
- Scroll to Custom CSS – all the way to the bottom.
- Enter your custom CSS code. I’ve included examples below.
This method is manual – without the use of another plugin. But don’t worry. It’s surprisingly easy to modify. And you can avoid adding the bloat of yet another plugin.
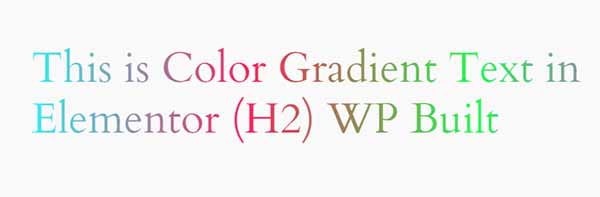
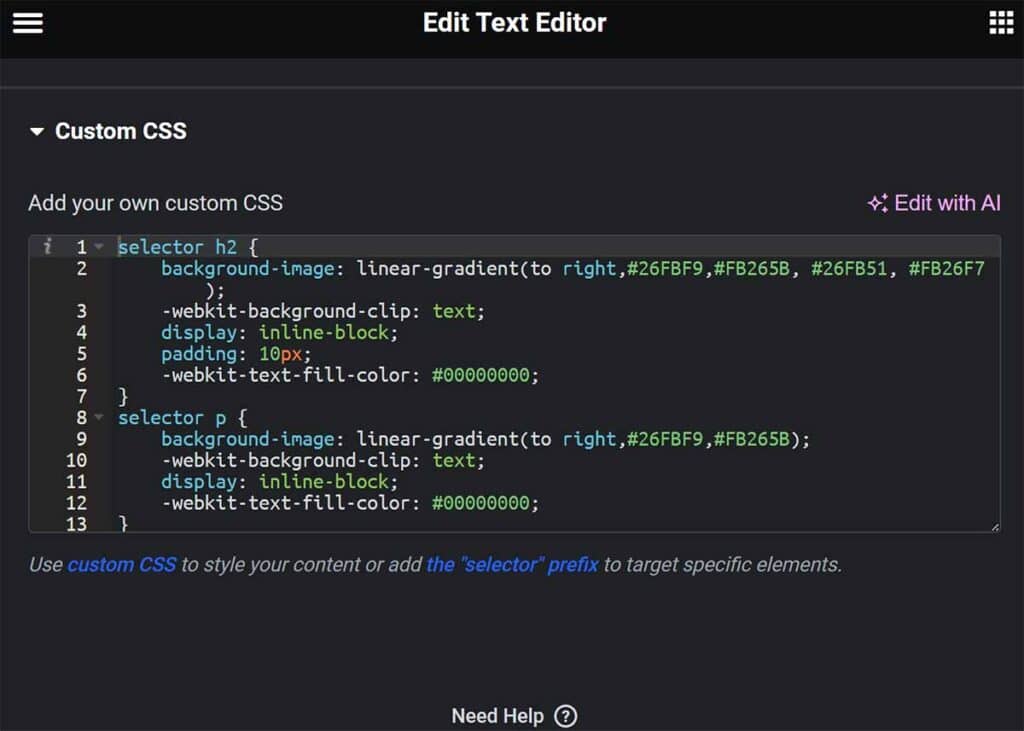
Here is the CSS code that I used to create a gradient color on my H2 header.
selector h2 {
background-image: linear-gradient(to right,#26FBF9,#FB265B, #26FB51, #FB26F7);
-webkit-background-clip: text;
display: inline-block;
padding: 10px;
-webkit-text-fill-color: #00000000;
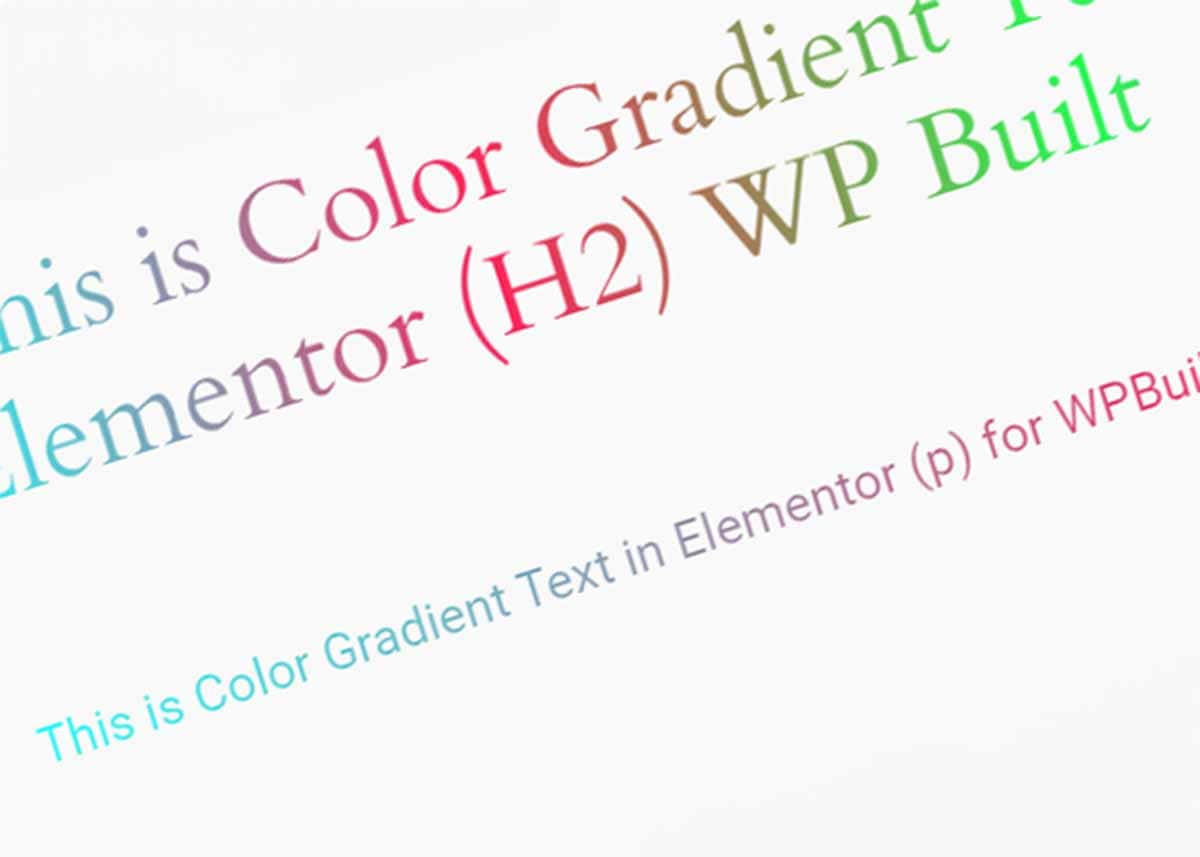
}You’ll see that there are 4 gradient colors that transition from one to the next.
You need a minimum of two colors and can add many hex codes. The order matters, so you just move the hex codes as required.
If you copy/paste the CSS code above, you should get the same thing as me.
And if you need help choosing hex codes, this site will help.
Here is the CSS used in the paragraph. You’ll notice that there are just two hex codes in this one and the paragraph text reflects this. If you’re noticing what looks like a third color in the paragraph text, this is because of the blending of the two original colors. At the far right and far left of the line, you’ll see the true two colors in the CSS code.
selector p {
    background-image: linear-gradient(to right,#26FBF9,#FB265B);
    -webkit-background-clip: text;
    display: inline-block;
    -webkit-text-fill-color: #00000000;
}
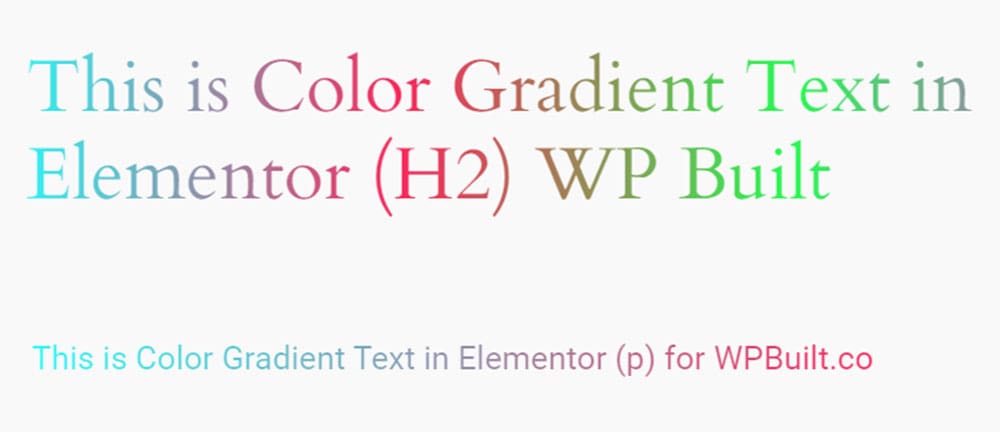
Top accomplish both gradients in the same text box, just combine the two pieces of CSS.
Here’s what it looks like.
See the text live on my test site.
If you use both blocks of CSS, this is the result you’ll get:
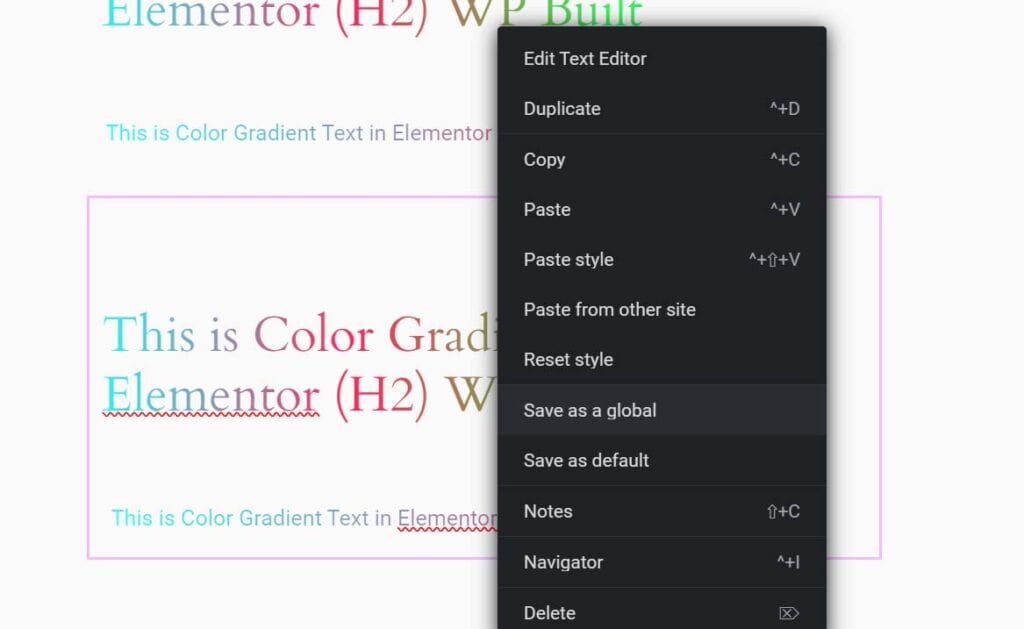
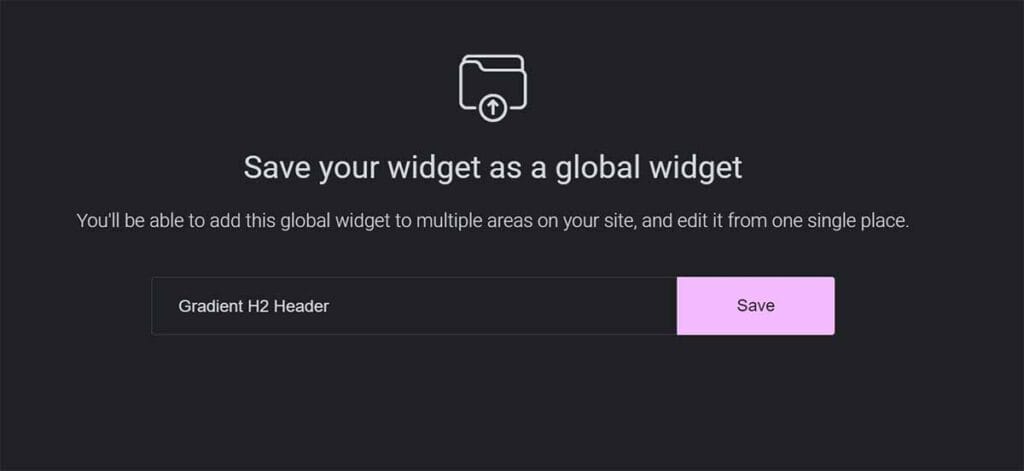
Step 4: Saving as Preset (Global)
Now, if you want the ability to use this gradient again you should do this step.
- Right-click on the text editor and select Save as a Global.
- You can save these settings as a template. Iin the preset name, I recommend including H2 for header templates, P for paragraph, etc to make it easier once you have a large set of global widgets.
When you use this preset on another page, you might consider Unlinking it from the saved widget. Otherwise, any changes you make to the second instance will also affect the first instance.
Keep reading: How to set equal height columns on Elementor
Save time by importing Elementor templates.
Your turn
How did the task go for you? Were you successful at creating color gradient texts in Elementor?